The 1map portal allows users to import spatial data and display it as a private or shared layer. This data can also be edited and viewed in the same way as any other 1map layer.
(Understand different upload formats and how spatial objects can be generated from coordinates listed in the upload file. Understand the difference between new layer, append-to-layer and synchronize to layer.)
Importing A Layer
Step 1
Click on the Import button in the top menu bar to open up the Import Layer wizard.

Click next to proceed.
Note: To open up a list of all completed or current import jobs, click on the Import Jobs icon in the bottom left corner of the wizard screen.
To proceed to the Import Layer Menu and print your map, click next.
Select the file which you would like to import as a new layer by clicking on browse, and selecting the file from the explorer.
Step 2
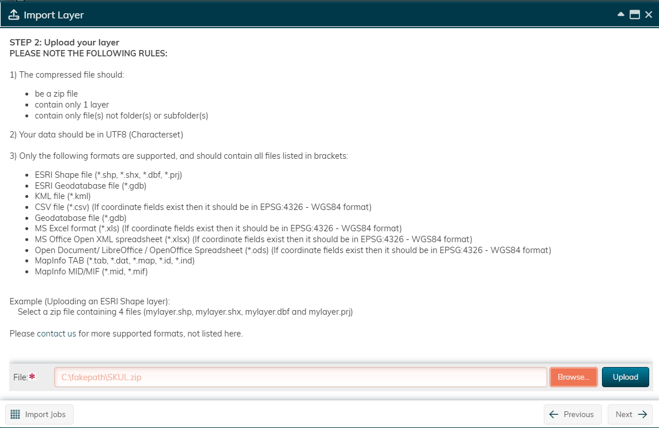
Note: It is important to remember that “a spatial file” actually can consist of multiple files. All the files that make up the spatial file to be imported should be included in the zip file.
See above screenshot for examples.
Example: Go to the file location of an ESRI Shape file (e.g. “My_Layer) that you would like to import. Select My_Layer.shp, My_Layer.shx, My_Layer.dbf, and My_Layer.prj. Right click, and select “Add to Zip”. You now have a Shape File that you can import.
Click on browse and navigate to the zipped file containing the layer you wish to upload (import).
Click on the “Upload” button in the bottom right corner of the window.
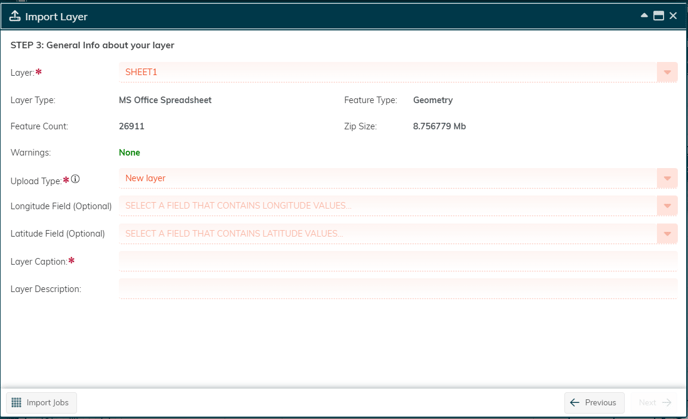
Type in a Layer Caption to name your layer.
Pro Tip: Give a descriptive title in order to quickly and easily find this layer in future. Also type in a Description for your layer, if this is not clear from the Layer Caption or if you plan to share this layer with others.
Choose the Upload Type from the dropdown:
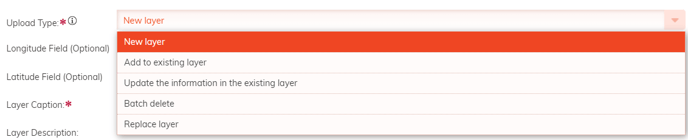
- New Layer
- Add to existing layer
- Update the information in the existing layer
- Batch delete and Replace Layer
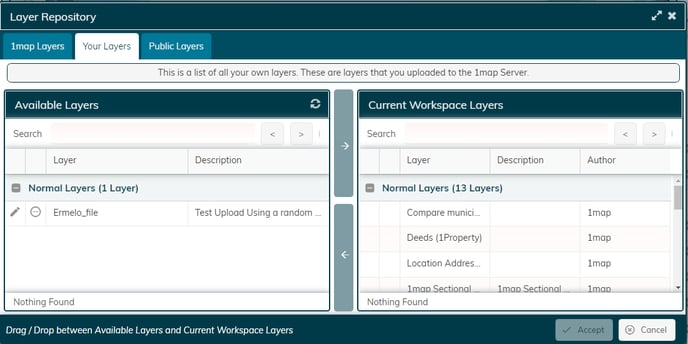
New Layer
Will create your layer from scratch. It will now be available under "Your Layers" tab. Remember to add your layer to your active workspace with the Layer Selector. For more information, see Active Workspace article
Add to existing layer
will Add the data you are importing as additional entries on an existing layer. Be aware that this will create duplicates if a key you upload already exists,
When you choose Add to existing layer click the dropdown box to select the layer you wish to append to.
The following screen appears and you need to match the field names which you used in the headings of your spreadsheet, with the field names defined on the existing layer.
Click on the "A" button in the middle of the screen to automatically accept all field names that already match.
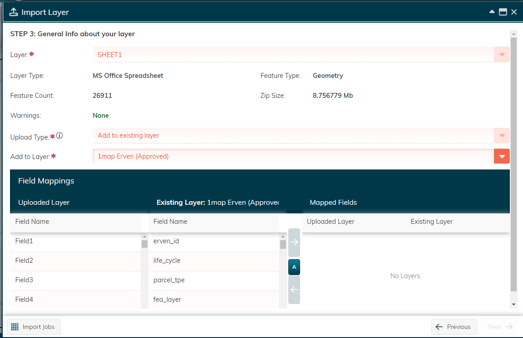
Any fields that didn't match the headings will still appear in the left columns and you can match them manually, for example
Click on Munic Dept in the left column and mun_dept in the right column, then click on the long left-arrow button to move this combination to the right.
Once you have matched all fields, click Next.
Any fields left in the left column will not be uploaded, and any in the right column will remain untouched on existing records.
Click on Done to start importing your custom layer. You will receive an email once your layer has finished importing.
Update the information in the existing layer
This will retain the existing data in the layer. It will add new data, override any matching key with the new data and retain any data for which there was no match.
Batch delete and Replace Layer
Be very sure when you use this option as any data previously on the layer will be erased.
Import Job completed

You should now be able to upload and edit your own layers in 1map, and infinite possibilities open up to you!