Accessing User Management
- Click on Portal in the top menu bar and navigate to Dashboard or hover over Admin Settings and Click on Users;
- If you open the dashboard, you will see all the features available to you, under Admin Settings, click on Users;
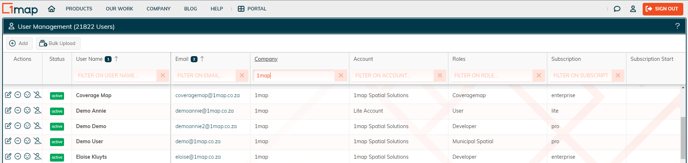
- Once in User Management, you will see all the users associated with your Account, with the total number displayed in brackets at the top of the window;
- Here you can get an overview of your users, their roles, their emails and when they last logged in to 1map.
Editing Users
In the User Info window, you are able to edit user information such as their subscription or roles but not their account information.
- To edit the user information, click on the pencil under Actions, to the left of the user’s name;
- The User Info window will open, here you can edit their information including their password;
- If you would like to downgrade their subscription, click on Subscription and select ‘Lite’ from the dropdown menu;
- If you would like to change a user’s role, you can click on the roles dropdown arrow and a list of roles associated with your account will appear, select the one you need;
- Click ‘Save’ in the bottom right hand corner to save your changes.
Note: Do not remove “Account Administrator” role from my own user account, or you will no longer be able to access Account Administration!
Deleting a User
- You need to downgrade a user’s subscription before deleting their information;
- Open the User Info window and downgrade their subscription to ‘Lite’; their roles will change automatically;
- Click save and return to the User Management window;
- Click on the Delete button
to the left of the User’s name and click Yes when prompted to delete the user.
Restoring a User
- You are able to restore a deleted user by clicking on the delete button;
- Click ‘Yes’ when prompted;
- The user’s information will be restored but there subscription and role will not;
- To restore their Subscription and role, you will need to open the User Info window and reinstate their information there.
Adding a new User
- To add a new user, click on the Add button in the top left hand corner of the User Management window;
- Enter all the user information; email, first name, surname etc.
- Change the user’s subscription (Pro or Premium);
- Change the account to the account name of your organisation;
- Select a role from the predefined list of available roles;
- Enter the rest of the required information;
- Click save.
Tip: You are able to load users through a Bulk Upload process, you will need to create a spreadsheet that has, in the correct order, all the fields required when adding a user. Fill in all the information for all the users. You can load into 1map by clicking on ‘Bulk Upload’ and browsing to your spreadsheet and clicking Upload.