Accessing 1map Spatial
Open your web browser (Chrome or Firefox generally work the best) and in the web address window, type in 1map.co.za and press enter.
Notes: There is a Help button on this screen where you will find “How-to”, a step by step guide if you want to explore the application for yourself.
Logging in to Your Account
Click on the green SIGN IN tab.
Enter your registered email address and password.
If you have not signed in before, click on the “Forgot your Password” link.
An email will be sent to you to allow you to set up your password for the first time.
After setting up your password, return to this screen and enter your password, click “Sign in”.
Notes: Password is a minimum of 8 characters and can contain any alphanumerics. It is recommended that you change your password to something unique to you.
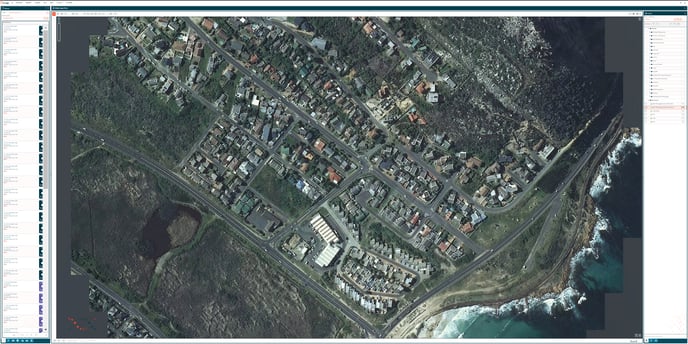
The map and spatial data displays. If you are registered as part of an organisation, the map is focussed on your area of interest.
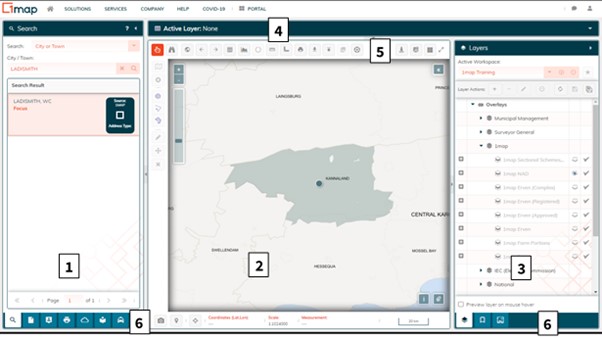
|
1 |
SEARCH PANEL |
|
2 |
MAP PANEL |
|
3 |
LAYERS PANEL |
|
4 |
DATA PANEL (Active Layer heading) |
|
5 |
TOOLBARS |
|
6 |
ADDITIONAL FUNCTIONS |
THE MAP PANEL
The centre panel displays the map for your area of interest. You need to be able to access this visual representation of your map by moving into different areas at different scales. How to navigate in this panel is described briefly here, or use this link to
which includes a short video.
Stepping Through Recent Views
To go back or forward through previously viewed zoom states, click on the arrows in the top toolbar. This is particularly useful to return to an extent that you had viewed previously in this session and want to revisit.
The actual content of what is presented visually in this central panel is controlled firstly, by which area or feature you choose to zero in on using the search facilities in the left (search) panel, and secondly, which layer or layers of information you choose in the right (layers) panel.
for more information about each of the functions available go to the detailed description of the toolbar icons at this link:
Maximizing the map on your screen
Because the application runs in a web browser, the top part of your screen continues to display the browser tabs and controls. As you won’t use these while you are in the app, press F11 to hide them, and F11 again when you need to restore them.
If you are concentrating on the central panel you can collapse the other panels until you need them. You do this by clicking anywhere on the heading of the panel:
The panel collapses and only the heading remains, but now it runs vertically along the side of the map panel.
With the search panel collapsed, significantly more of the map is displayed. Restore the side panels by clicking again anywhere on their headers.
You can also use keyboard (ctrl +) and (ctrl -) to enlarge the size of the map. The trade-off is that the text in the side panels becomes smaller.
Clicking on it again will restore it to its original position.
Panning
- Pan (move around) the map by clicking anywhere on the map, holding down your left mouse button and moving the mouse around.
Zooming
- Zoom in and out by clicking on the plus or minus buttons in the top left corner of the map window, or in the vertical toolbar below the plus and minus buttons.
- Zoom in to a specific area by hovering over the area and scrolling the mouse wheel forward. To zoom out, scroll the mouse wheel towards you.
- Another way of zooming into a specific area is to hold down the SHIFT button on your keyboard, click and hold down the left mouse button, and drag a box around the area you would like to zoom into. Release the mouse button to zoom to the area.
- To zoom to the full extent (i.e. the whole of South Africa visible at once), click on the globe button in the top toolbar, next to the binoculars.
-
To go back to a previous zoom extent, or forward to a previously displayed zoom extent, click on the arrows in the top toolbar.
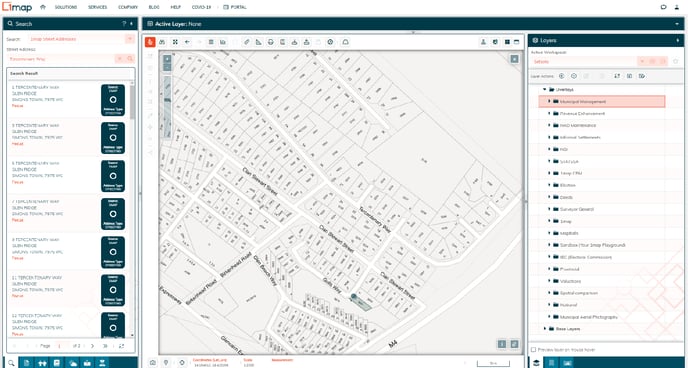
THE LEFT PANEL
On the left of the map window is an accordion menu, with several tabs at the bottom providing access to additional functions. By default, this panel starts up displaying the SEARCH Menu for finding properties (Magnifying glass icon).
Search (Finding a Property)
Click on the drop-down arrow to see various ways you can search for the property or area you are interested in.
The 1map National Address Dictionary (NAD) is used to process your query.
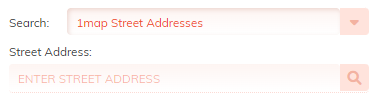
Search by 1map Street Address:
Enter the street address that you wish to search for and press Enter on your keyboard. The lookup could potentially display all instances of the street name throughout the country, so if it is necessary to refine your search, add your province code viz. EC: Eastern Cape / FS: Free State / GT: Gauteng / KZ: KwaZulu-Natal / LP: Limpopo / MP: Mpumalanga / NC: Northern Cape / NW: North West / WC: Western Cape.
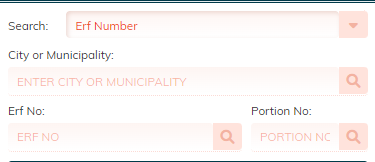
Search by Erf (Stand) Number:
Use this method to search for a specific erf by erf number in a given city or municipal area. Enter the name of the city or municipality in which the erf is situated. Enter the erf number. Typing the portion number is optional. Press Enter on your keyboard or click on the magnifying glass icon next to the field you entered.
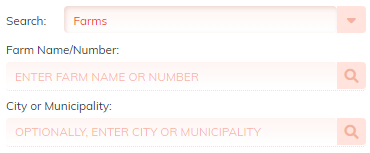
Search by Farm:
Use this option to search for a farm for which you have the farm name or number.
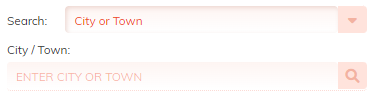
Search by City or Town:
Use this option to go to the centre of a district.
Pro Tip: Searching by city or town will take you to the centre of the district, which may or may not be in an urban area. If you want to go to the centre of the city or town, search for the town name under “Suburb”.
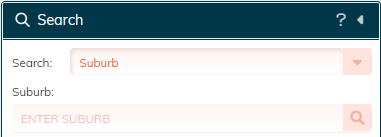
Search by Suburb:
Use this option to go to the centre of a suburb.
THE RIGHT PANEL - LAYERS
Spatial information is displayed as layers.
In the Map Layers accordion menu on the right, the Map Layers tab is selected by default.
You will see a tree structure with two main sections: Overlays and Base Layers.
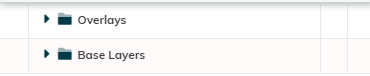
Base Layers
Click on Base Layers. This section opens to reveal all the possible Base Layer options.
Each layer has an “eye” to the right of it. Only one base layer can be active at a time, so clicking the eye “on” on a layer toggles the previously chosen layer “off”.
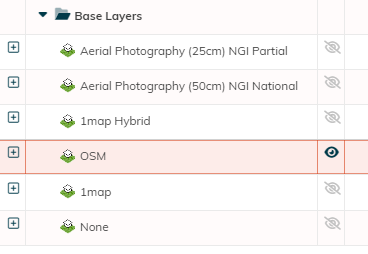
What you choose here is what displays in the centre Map Panel.
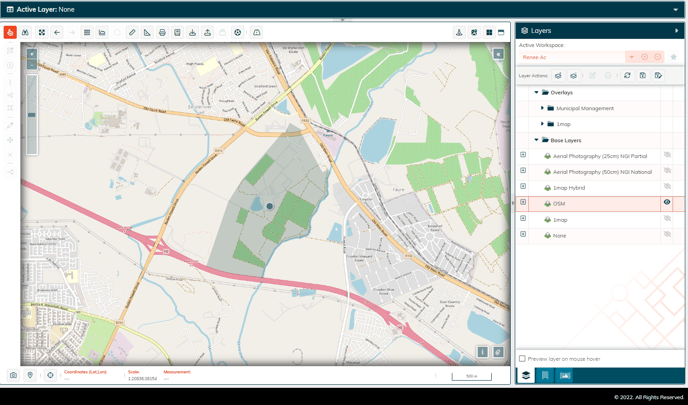
There are 3 base layers I want to draw your attention to.
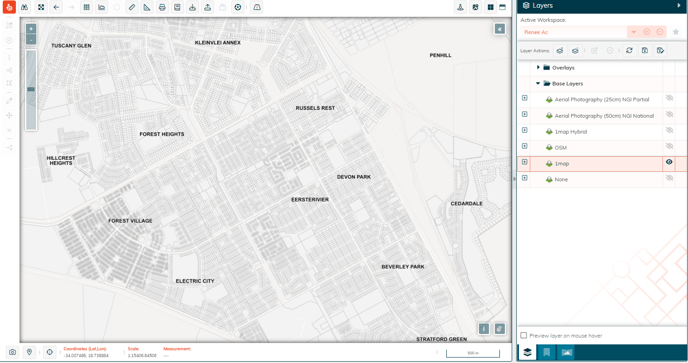
The 1map base layer is a combination layer that shows the boundary lines of the property, the street number, positioned on the boundary line, and the stand number at the centroid.
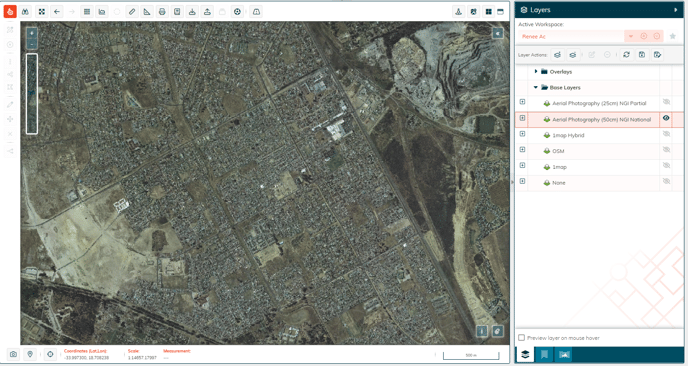
Aerial photography (50cm) NGI shows the last image captured for the properties.
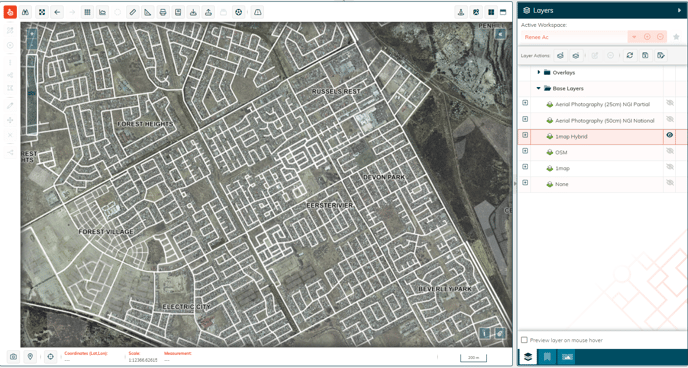
And 1map Hybrid is a combination of these two. Clicking “None” means no base layer will be displayed.
Overlays
There are Several Groups of layers but the ones that are important for now are:
Expand a group to view the layers it contains by clicking anywhere on the group heading; for example:
Unlike base layers, these overlay each other, building a composite visual result. The order in which layers are listed determines the order in which they are overlaid, and you can change the order by clicking on a layer and dragging it to a new position in this panel.
(The significance of this will become clearer the more you use the application. For now, you just need to be aware of the option).
The two columns on the right are where you control whether a layer is viewable and whether it is active on your map.
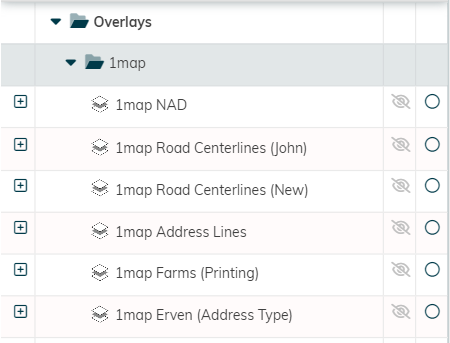
To make a layer viewable, click on the icon that looks like an eye.
To make a layer active, click on the circle next to the layer.
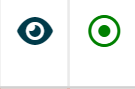
It will turn green to indicate that this is the layer that can be selected and edited.
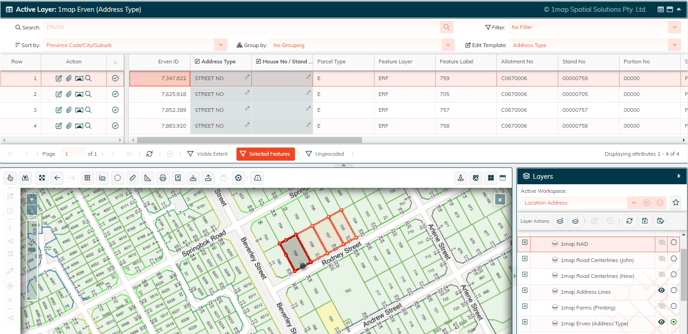
The 4th panel above the map which, by default, isn’t open when you log in, contains the attribute data connected to the active layer.
To open the Active layer to see the data attributes,
click on the down arrow or anywhere on the heading.

This is what the data panel looks like for the layer we chose as “active” in the above example:
The properties highlighted in red on the map are listed in the grid in the Active Layer Panel and you can now see the data that is connected to each property. For the erven layer chosen here, we can see the Allotment code, stand and portion number that make up the SG key for the property, what type of address is connected to the property, its suburb etc. As you scroll to the right of the grid, much like you would use a spreadsheet, you will see additional columns of information for each property.